Hooray for more crafts!! Donnie recently went to a conference for super cool debate coaches, and while he was gone I decided it was a good time to take on a craft I’ve been wanting to do for a while. I also decided that Doug (my wonderful brother in law) was in desperate need of some sister time. I’m not positive he felt the same way because by sister time I meant manual labor 😀 Hehehe
Since joining Pintrest I have pinned many ideas for wonderful crafts but I’ve never actually done any of them. I decided it was high time to change that. I made those cool stools, I’m currently working on a wine bottle project that will be posted at a later date (I ran out of empty wine bottles for that one and am currently working on gathering more materials haha).
Like many others on Pintrest I am obsessed with pallet furniture. It seems like everyday I come up with a new idea to make something out of a pallet, bookshelf, coffee table, end table, wall art, wine rack. I finally settled on wine rack because well I need a wine rack =]
The first step in this process is to get a pallet. I thought this would be the easiest part, and it was, but it was not as easy as I suspected. I called Lowe’s, Home Depot, and D&B. I was totally shut down. Apparently there is a company that purchases pallets from these company’s and does who knows what with them. At any rate they were not giving me any. So I turned to my good friend Google and searched “free pallets in my area”. After calling a few more places I was given the green light from a local recycling shop. They said, “You want a used pallet? Ummm ok come down and take whatever you need…” I respond with an abundance of enthusiasm and quickly headed their way.
Pallet Pro Tip: They are not small. I pulled up with my little Chevy Colbat and was all, “I’m going to get this in my trunk go to Doug’s house and get to crafting!” It did not fit…after a quick stop for a new vehicle (Thank you in laws for the use of the big red jeep) I did indeed put the pallet in the trunk and was off to craft.
The tools that are needed for this project are:
- Pallet
- Jigsaw
- Regular saw (hand or electric)
- Sandpaper
- Stain, paint brush
- Various nails/screws and the means of putting those in (hammer, screwdriver)
- Awesome Family! (not necessarily necessary but I had it and it was awesome)
- Anchor mounts from a local hardware store (http://www.lowes.com/pd_114823-10337-50325_0__?productId=3181731&Ntt=dry+wall+anchors)
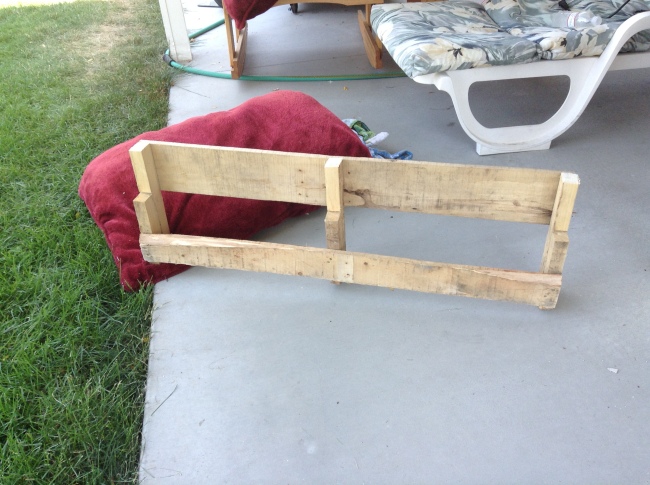
After getting the pallet the first step is to separate the part you need from the rest of the pallet. After looking at some other projects online we decided to use two rungs.
One of my rungs was missing a board so we added that to the back and took another piece from the original pallet and added that for a bottom to end up looking like this.
After the initial set up we should have cut the middle piece to be level with the front shelf, but we didn’t realize that until later. So you can benefit from our error and cut that now. It wasn’t a huge deal later on, but still. Then we used the Jigsaw to curve the outside edges. I should clarify here, by we I mean Doug. He did all the cutting and most of the hammering (sister time is awesome right?! 😀 ).
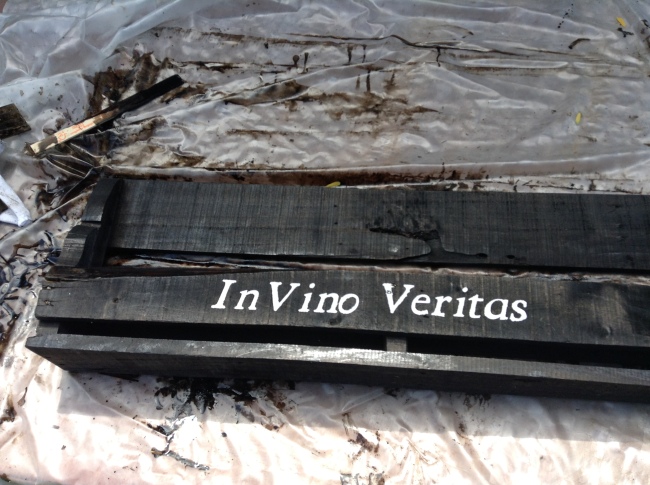
Next I stained the pallet. My mother in law had some left over stain/clear coat that she let me borrow. It was supposed to be dark brown but turned out black. I really like the look though so I got lucky there! After staining we stenciled on the phrase “In Vino Veritas” which means “In wine there is truth” I really liked the sentiment, and I think it makes this particular pallet wine rack more unique.
Our final step was to build a rack for the glasses, attach and hang it. For the glass rack we used another board from the pallet and cut premeasured U-shaped holes in the bottom, again with the Jigsaw. Then we screwed it in. We made sure that the back side was slanted so when the glasses hung there gravity gives them some natural stability (that was again Doug, the mathematicians idea!) I didn’t get a great picture of them up close (sorry 😦 ), but we just used the bottom of a wine glass for reference and evenly spaced them.
To hang it on the wall we went to Lowe’s and they recommend dry wall anchor brackets that can hold up to 260lbs!!!?!! Donnie picked those so we don’t have to worry about it falling…ever…he used four. I would recommend using those brackets or drilling into a stud for a strong hold. We found the brackets in packages next to the other screws.
Here’s the result!
I decided that half of it would be wine and half could be liquor because, well that’s a lot of wine! And I had envisioned a classy/old west cowboy feel and I think the black stain, white lettering, and whiskey highlight that idea. All and all it was a great project made in about 6 hours over two days, and I couldn’t be happier with it.
This project only cost me about 5 dollars. I only ended up paying for the anchors and one paint brush! Thrifty and useful! That’s my kind of project! Good luck on your next project!


